
Two Factor Authentication (2FA) with AD/LDAP Server
Draytek offers two-factor authentication solution for customer using AD/LDAP to authenticate remote dial-in VPN clients. It can add extra layer of security for VPN connections, and customer can also benefit from saving the extra cost on SMS messages or license fees for the official authentication system.
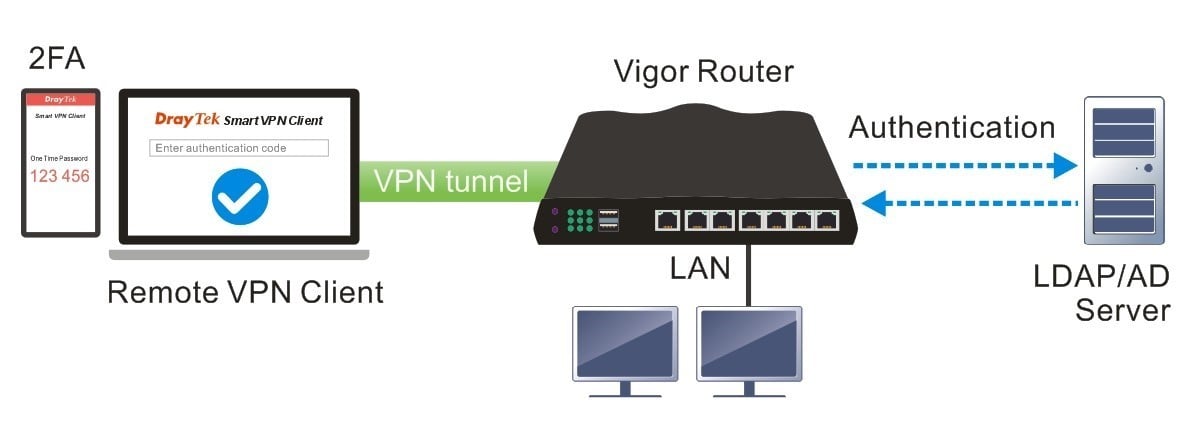
This document will demonstrate how to activate two factor authentication on your remote dial-in VPN connection with AD/LDAP server.
Note:
- Support Model: Vigor3912 (firmware version 4.3.4 or later), Vigor2962/3910 (firmware version 4.4.3 or later)
- Smart VPN Client: Windows version 5.6.2
- Support VPN Protocols: PPTP, SSL, L2TP
For configuring AD/LDAP server, please refer to FAQ article: Authenticate Remote Dial-In VPN Clients with AD/LDAP Server
Time-based One-time Password (TOTP)
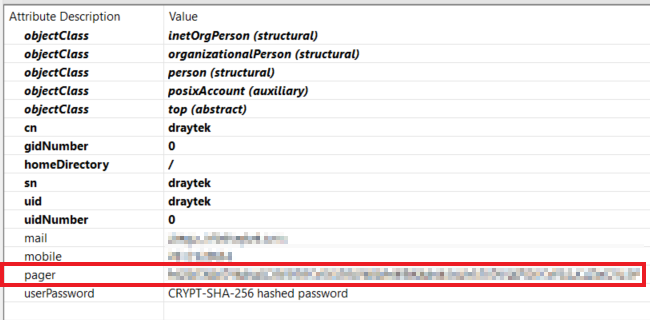
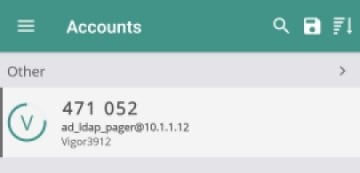
- Pager
- Make sure that pager attribute (or the other attribute that can be used to save the TOTP secret) is configured with TOTP secret in your AD/LDAP account.
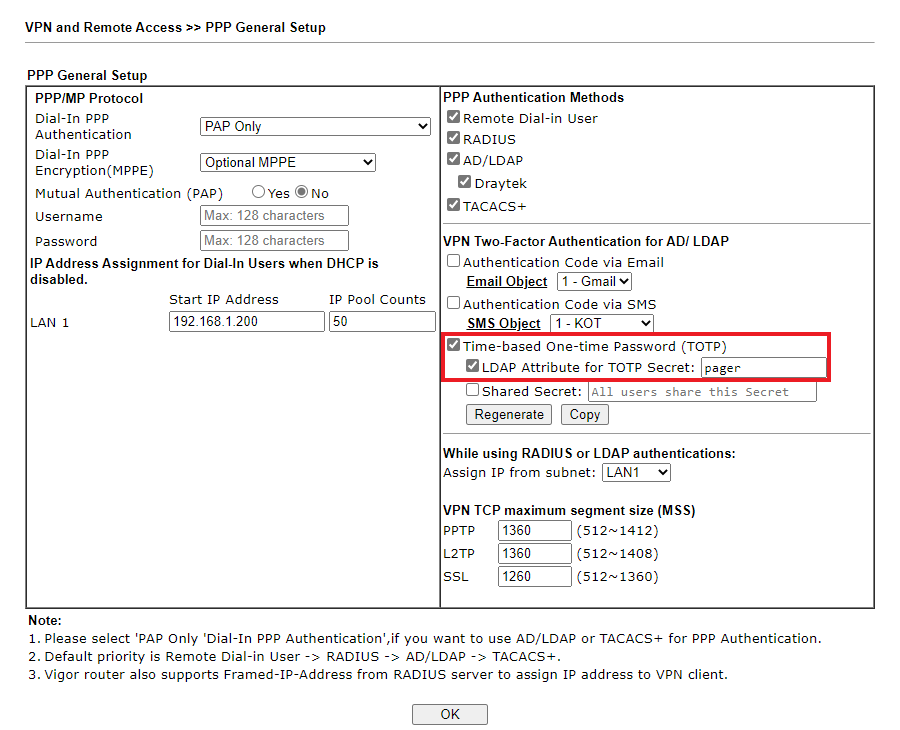
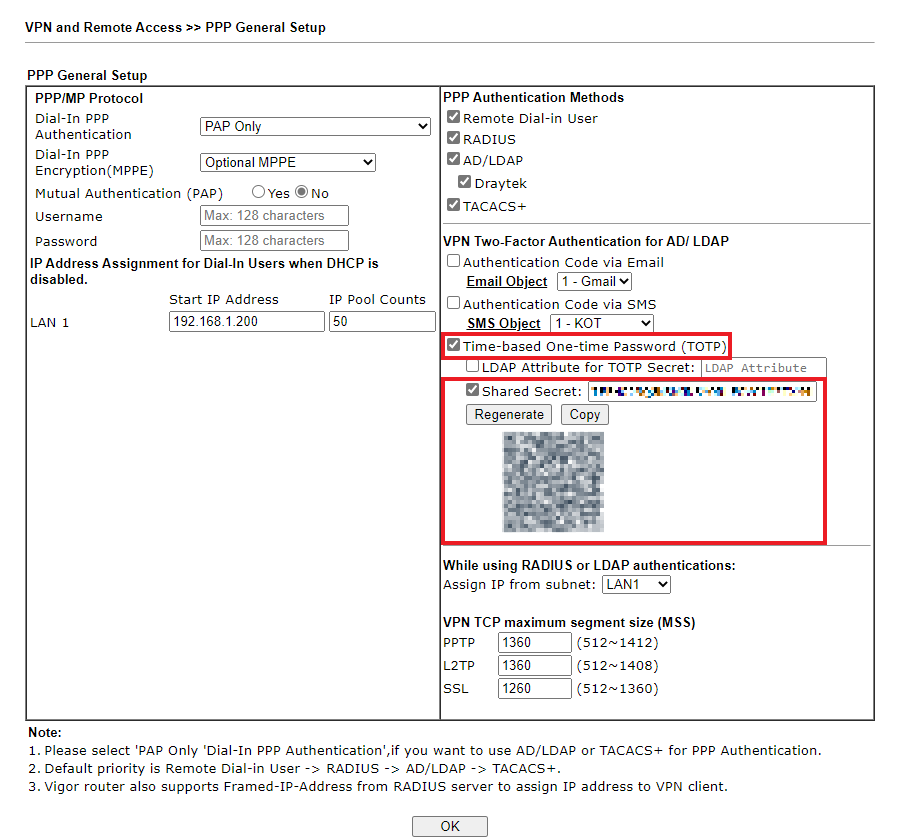
- Go to VPN and Remote Access >> PPP General Setup, enable Time-based One-time Password (TOTP) option.
- Select LDAP Attribute for TOTP Secret and fill in pager
- Open an Authenticator App. (e.g. Google Authenticator, TOTP Authenticator)
- Enter the Secret of TOTP to create an account.
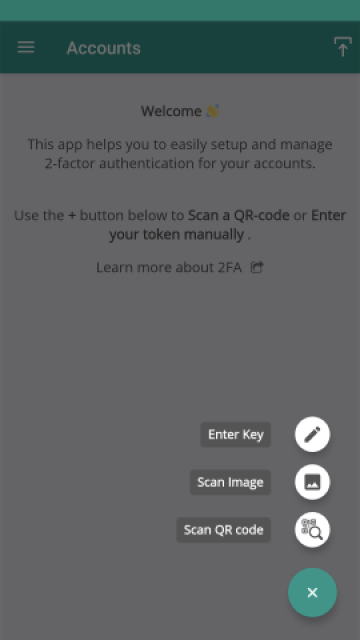
- We will be able to see the verification code in the App.
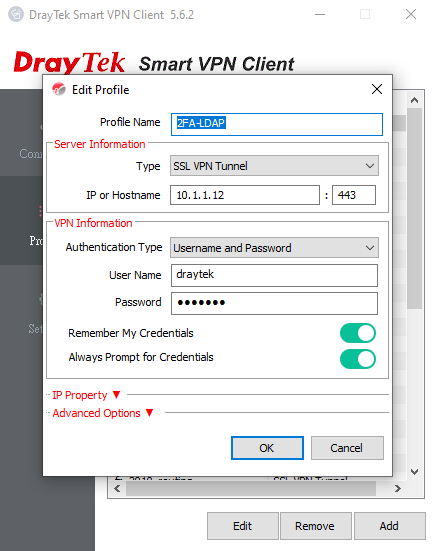
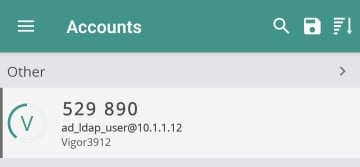
- Open Smart VPN Client app, click add to create a profile as follows:
- Enter the Profile Name.
- Choose a protocol in Type.
- Enter router’s WAN IP in IP or Hostname.
- Enter User Name and Password.
- Click OK.
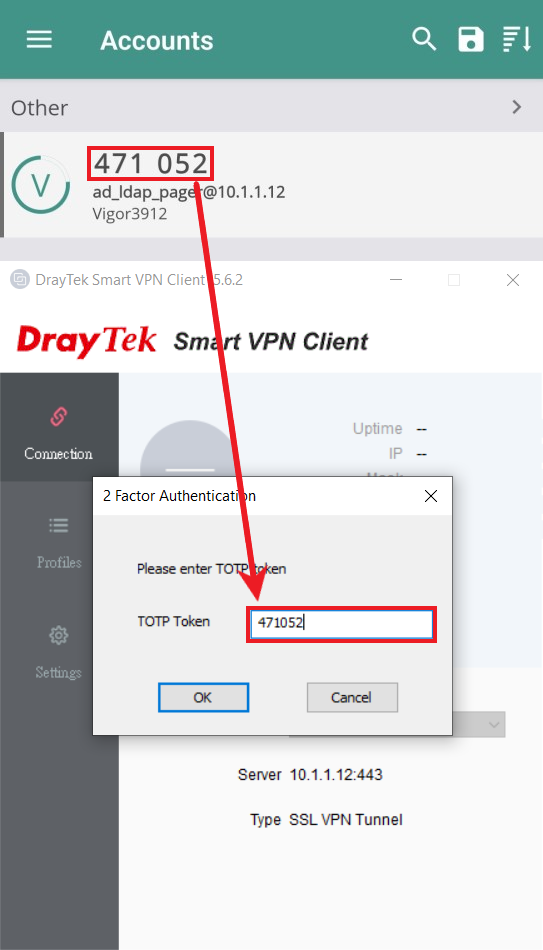
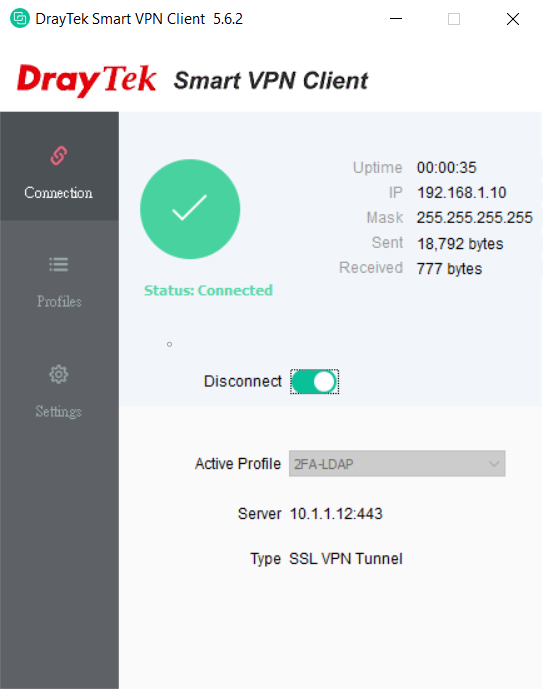
- Select the profile just created and swift to Connect. Confirm User Name and Password and click OK to dial up VPN connection.

- When two factor authentication dialogue pops up, copy the 6 digit verification code displayed in the App. Enter the code and click OK to proceed the authentication.
- Now the VPN is connected.

- Router
- Go to VPN and Remote Access >> PPP General Setup, enable Time-based One-time Password (TOTP) option.
- Select Shared Secret.
- Open an Authenticator App.
- Enter the Secret or scan the QR Code to create an account.
- We will be able to see the verification code in the App.
- Open Smart VPN Client app, click add to create a profile as follows:
- Enter the Profile Name.
- Choose a protocol in Type.
- Enter router’s WAN IP in IP or Hostname.
- Enter User Name and Password.
- Click OK.
- Select the profile just created and swift to Connect. Confirm User Name and Password and click OK to dial up VPN connection.
- When two factor authentication dialogue pops up, copy the 6 digit verification code displayed in the App. Enter the code and click OK to proceed the authentication.

- Now the VPN is connected.
Send via Email
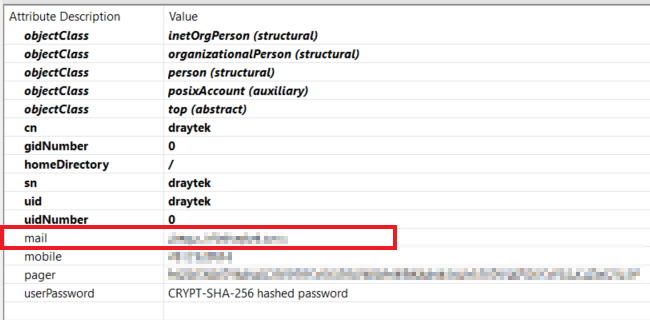
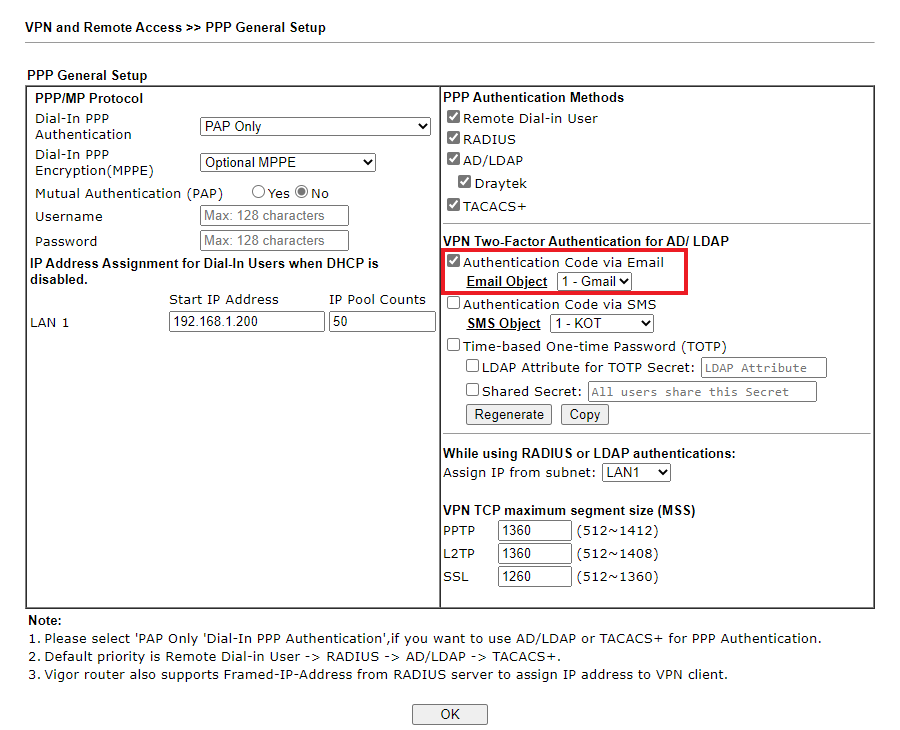
- Make sure that mail attribute is configured with the email address in your AD/LDAP account.
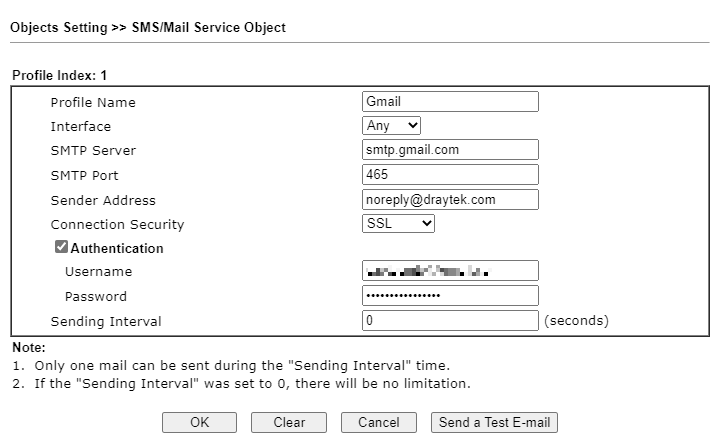
- Go to Object Settings >> SMS/Mail Service Object, setup a Mail Server Profile.
- Go to VPN and Remote Access >> PPP General Setup, enable Authentication Code via Email option and select the Mail Server Profile with customized username and password.
- Open Smart VPN Client app, click add to create a profile as follows:
- Enter the Profile Name.
- Choose a protocol in Type.
- Enter router’s WAN IP in IP or Hostname.
- Enter User Name and Password.
- Click OK.
- Select the profile just created and swift to Connect. Confirm User Name and Password and click OK to dial up VPN connection.
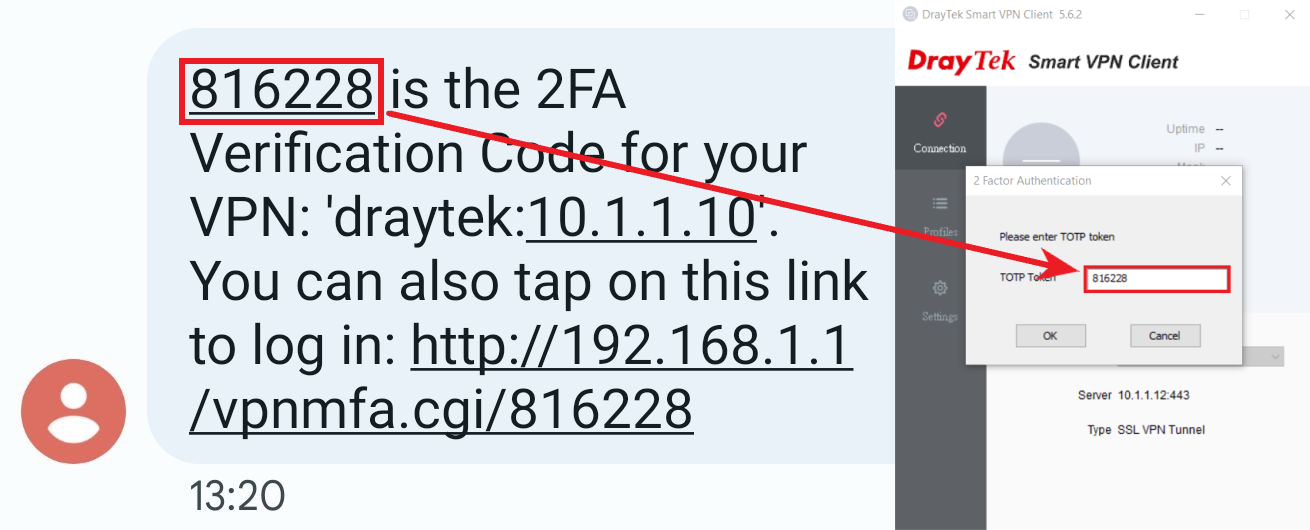
- When two factor authentication dialogue pops up, go to your email inbox and copy the 6 digit verification code received from the route. Enter the code and click OK to proceed the authentication.
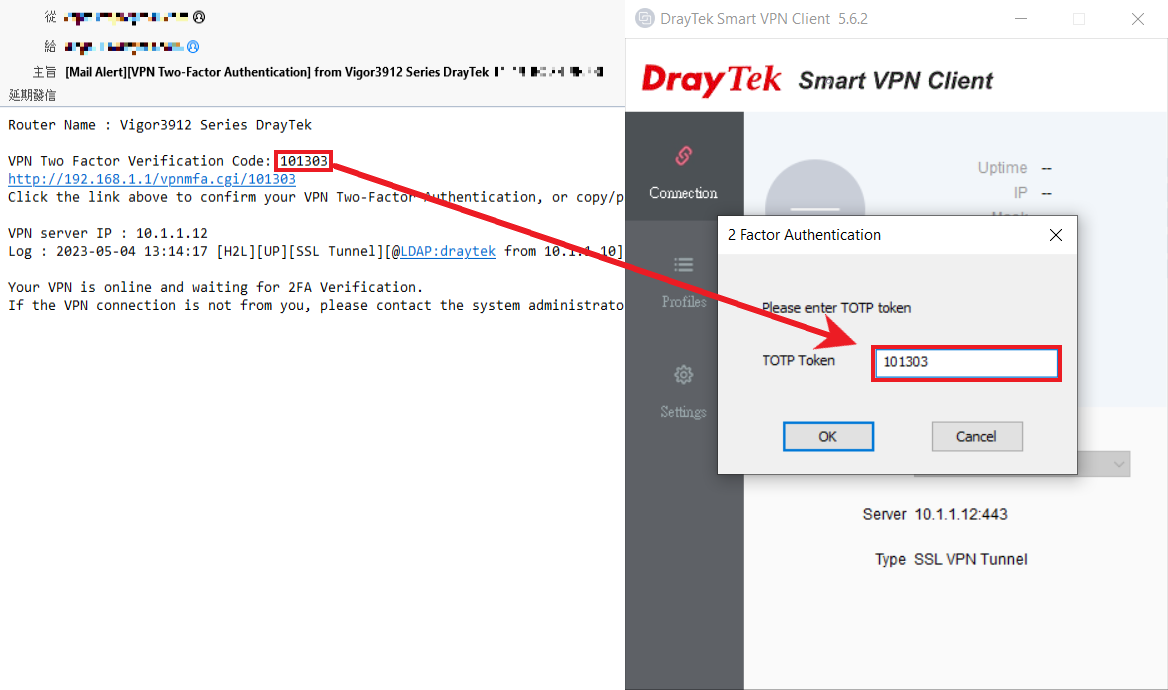
- Now the VPN is connected.

Send via SMS
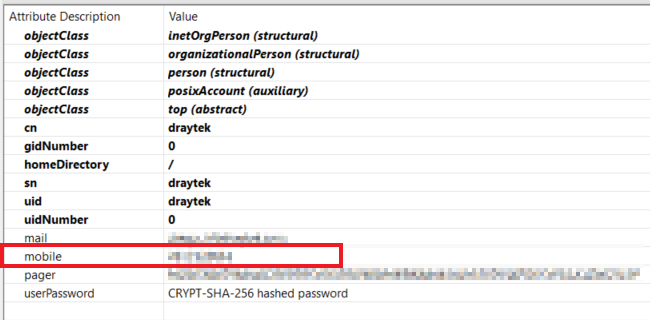
- Make sure that phone attribute is configured with recipient number in your AD/LDAP account.
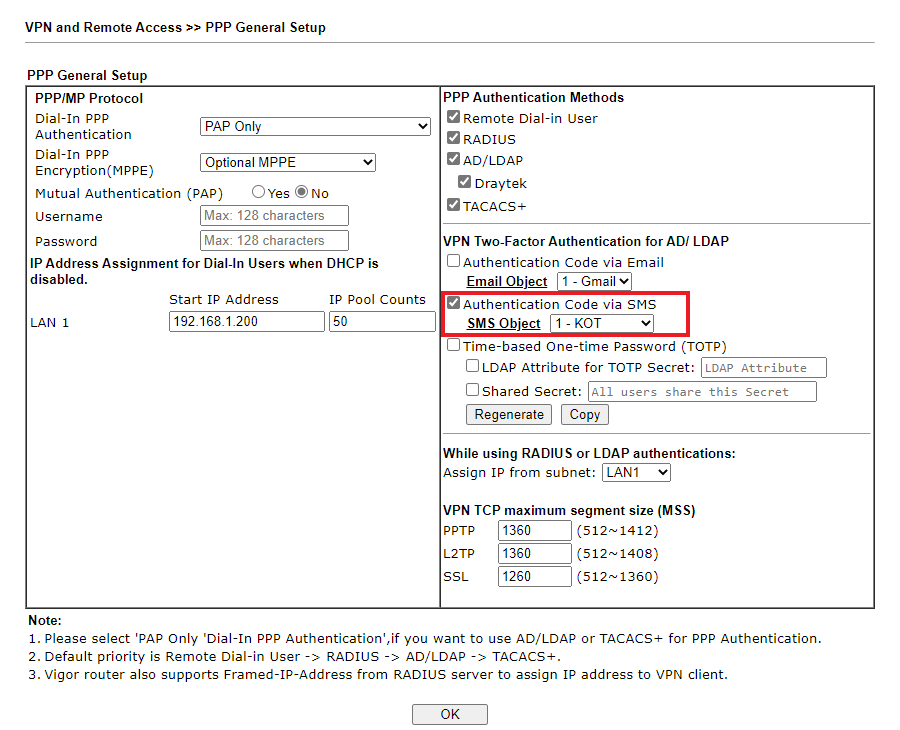
- Go to Object Settings >> SMS/Mail Service Object, setup an SMS Provider Profile.

Go to VPN and Remote Access >> PPP General Setup, enable Authentication Code via SMS option and select the SMS Provider Profile with customized username and password.
- Open Smart VPN Client app, click add to create a profile as follows:
- Enter the Profile Name.
- Choose a protocol in Type.
- Enter router’s WAN IP in IP or Hostname.
- Enter User Name and Password.
- Click OK.
- Select the profile just created and swift to Connect. Confirm User Name and Password and click OK to dial up VPN connection.
- When two factor authentication dialogue pops up, go to your SMS inbox and copy the 6 digit verification code received from the route. Enter the code and click OK to proceed the authentication.
- Now the VPN is connected.

Dial up VPN from other devices.
If the remote dial-in VPN user device is not Windows or not using Smart VPN Client (Windows), we can still activate 2-FA and enter the verification code with alternative method.
- Access Router’s WebUI page.
- Open your browser, enter router’s LAN IP to access router’s HTTP WebUI page.
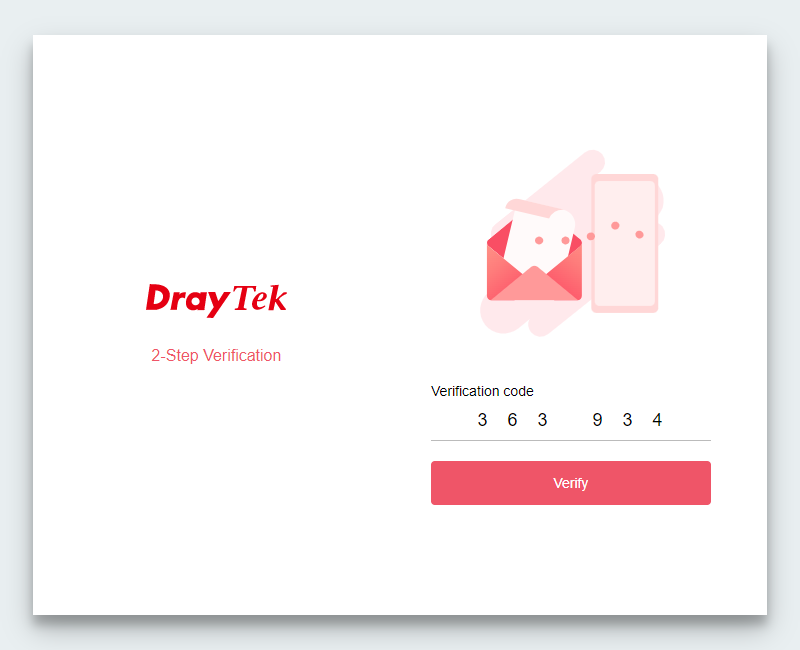
- Enter the 6 digit verification code and click Verify.
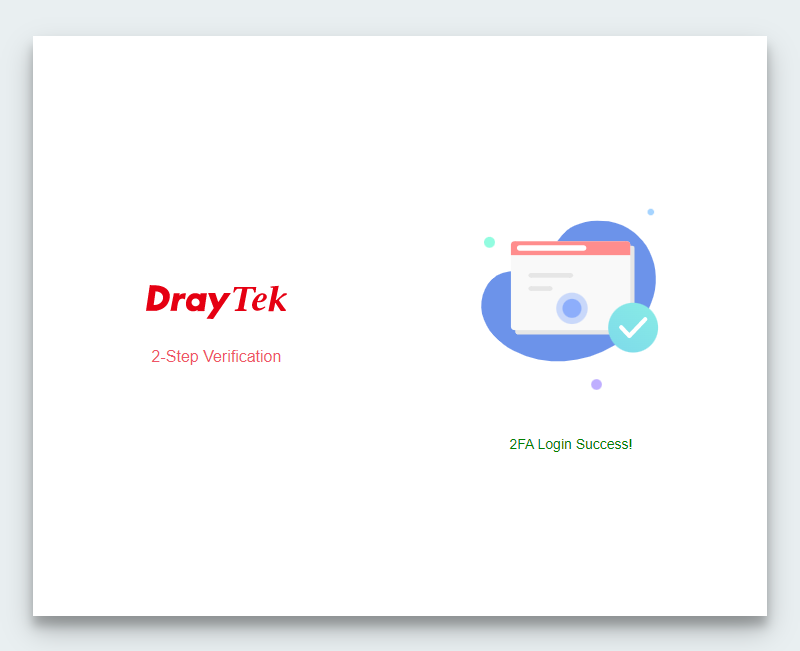
- Now the VPN is connected.
- Access the URL link from the notification.
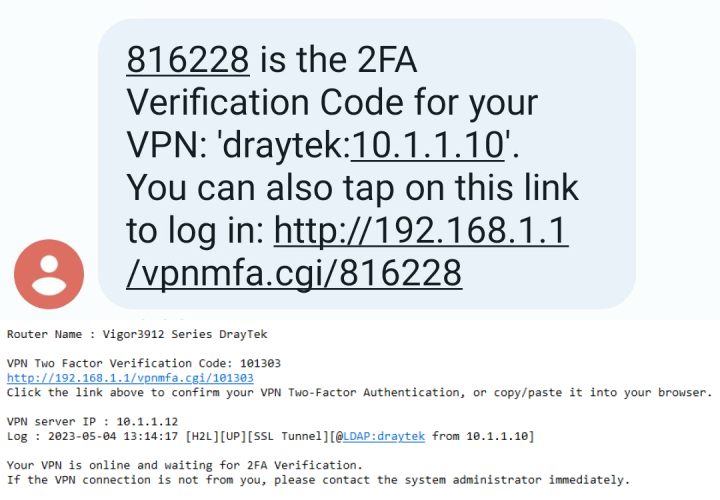
- Click the URL link provided in the notification message sent to your Email or SMS inbox. The URL will help you complete the authentication automatically.
- Now the VPN is connected.
Published On:2024-01-24
Was this helpful?